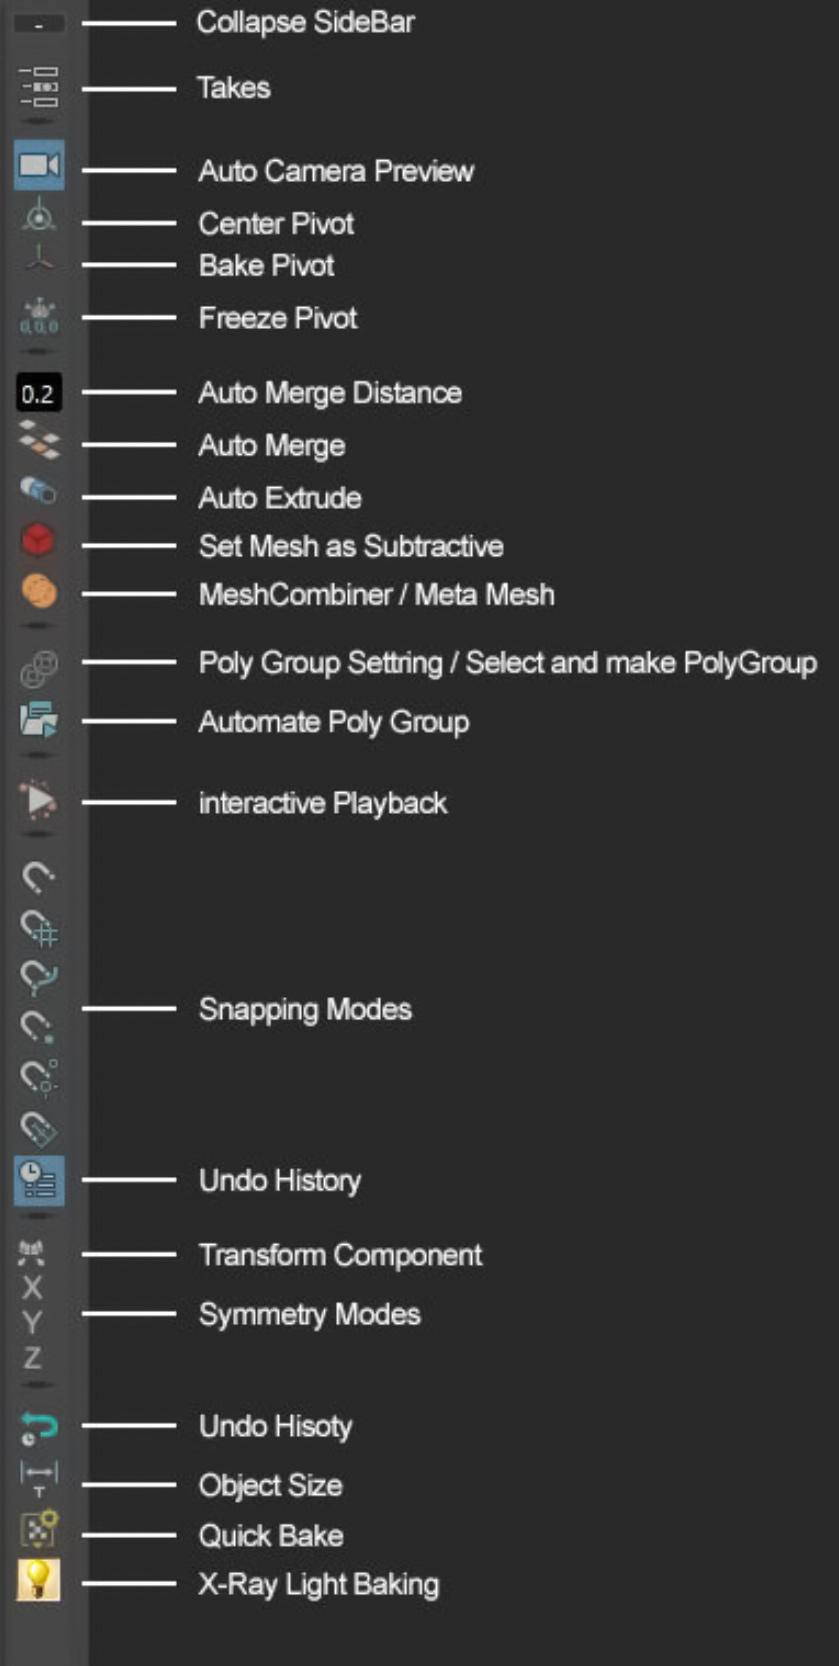
SideBar is located on the left side of the Attribute Editor and channel Box.
Collapse SideBar: this button will collapse the sidebar into a single line, clicking on that line will expand the sidebar.
Takes: a placeholder for a feature that is currently in production, will be available in the future.
AutoCamera Preview
one of the features that were inspired by
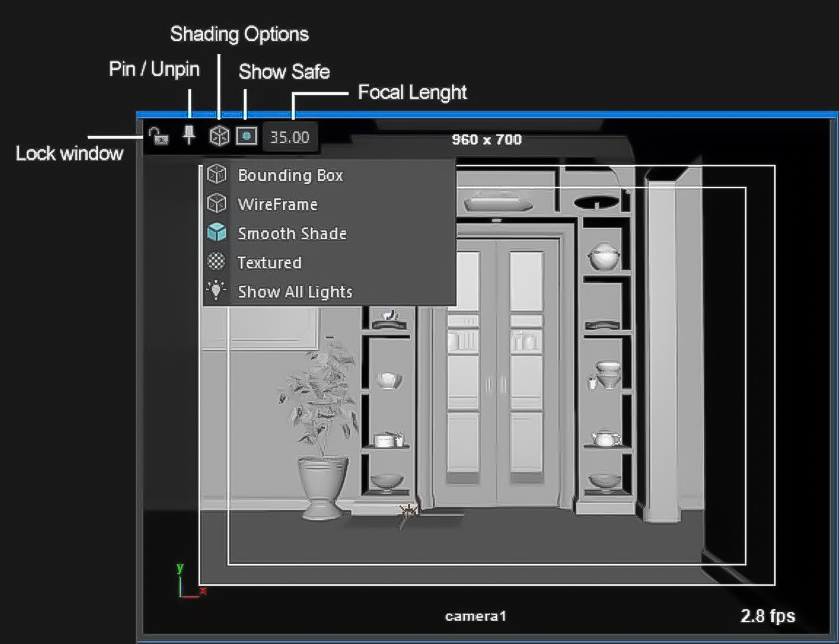
Unreal Engine 4, When you select a camera a small window will open up, showing you the view of the camera.
You can use them to position your camera or to quickly view multiple cameras at the same time.
By default, the window will be placed at the center of the screen but you can position it anywhere you see fit and it will stick to that position, even after you re-open the scene.
Lock window
if you enable this, the window will stay on screen even
if you de-select the camera.
Pin/Unpin
Show/Hide the Title bar. You can use it to position the
window on the screen or remove the window in case you have
deleted the camera but the window is still there.
Shading Options
Change view mode to wireframe, smooth shade,…
Show Safe Frame
Show safe frame and resolution gate
Focal length: View and Edit the focal length of the camera.
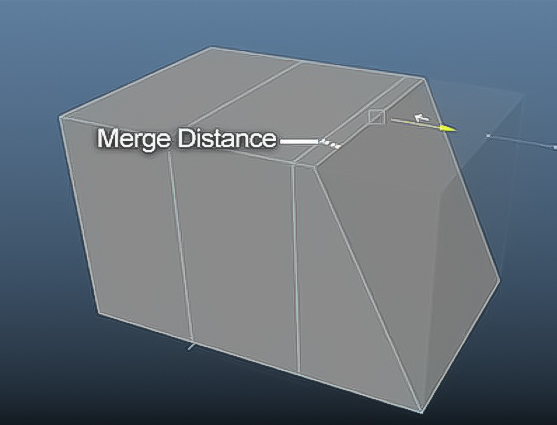
Auto Merge : inspired by ZModeler in Zbrush. Auto merge will let you merge components of a mesh just by dragging them close to each other.
Merge Distance controls the distance at which the components get merged.
AutoMerge won’t work if the value is too low or too high as there will be no vertices left.
One Important thing to know is that when you enable Automerge, it will delete your object’s History, and another thing is that when you enable Automerge a lot of merging will get applied to your object with almost everything you do, which means you will need to hit undo more times than it may seem.
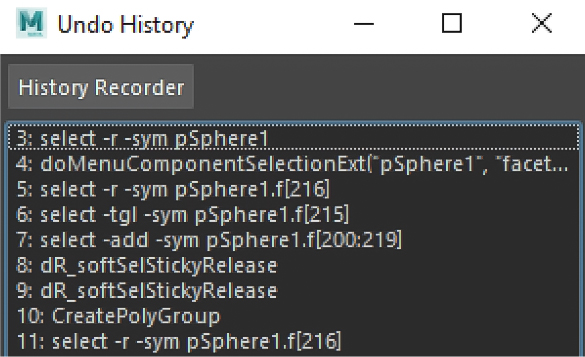
You can use Undo History to quickly jump back a few
actions.
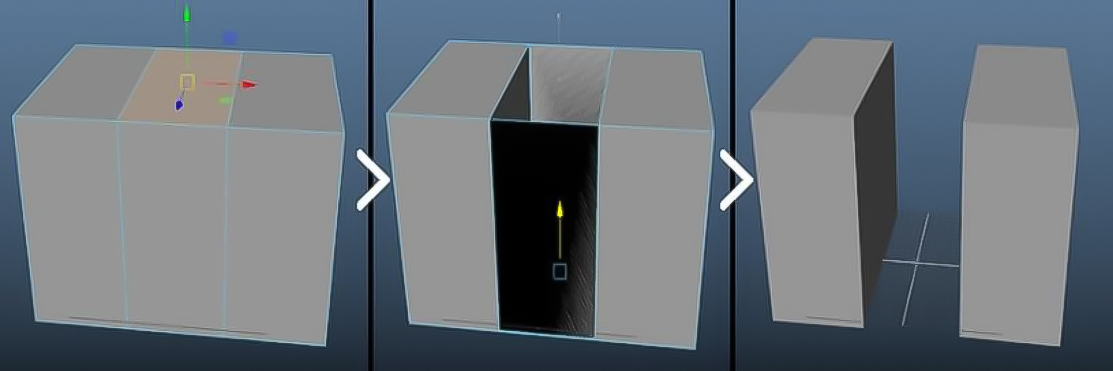
You can also extrude faces or edges into the mesh to remove a section.
Auto Extrude : Quickly and Easily Extrude a profile along multiple curves.
This is a very handy tool for making wires, hair meshes, hair cards, and such.
you can also enable Live Draw mode and use it to have a tool similar to Curve mesh brushes in Zbrush.
Live Draw Nurbs: when this checkbox is enabled, any curve you select will get
extruded into a NURBS surface. You can use the pencil tool to start drawing surfaces with the specified profile and attributes.
Live Draw Poly: when this checkbox is enabled, any curve you select will get extruded into a Polygon surface. You can use the pencil tool to start drawing surfaces with the specified profile and attributes.
Use This Profile: select a curve object and press this button to use that curve as the profile for extrusion.
NURBS Extrude: select a set of curves and press this button to NURBS Extrude them using the selected profile.
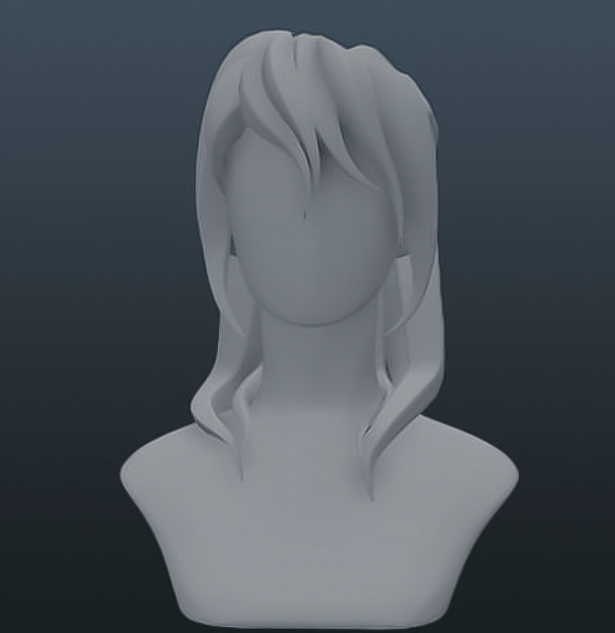
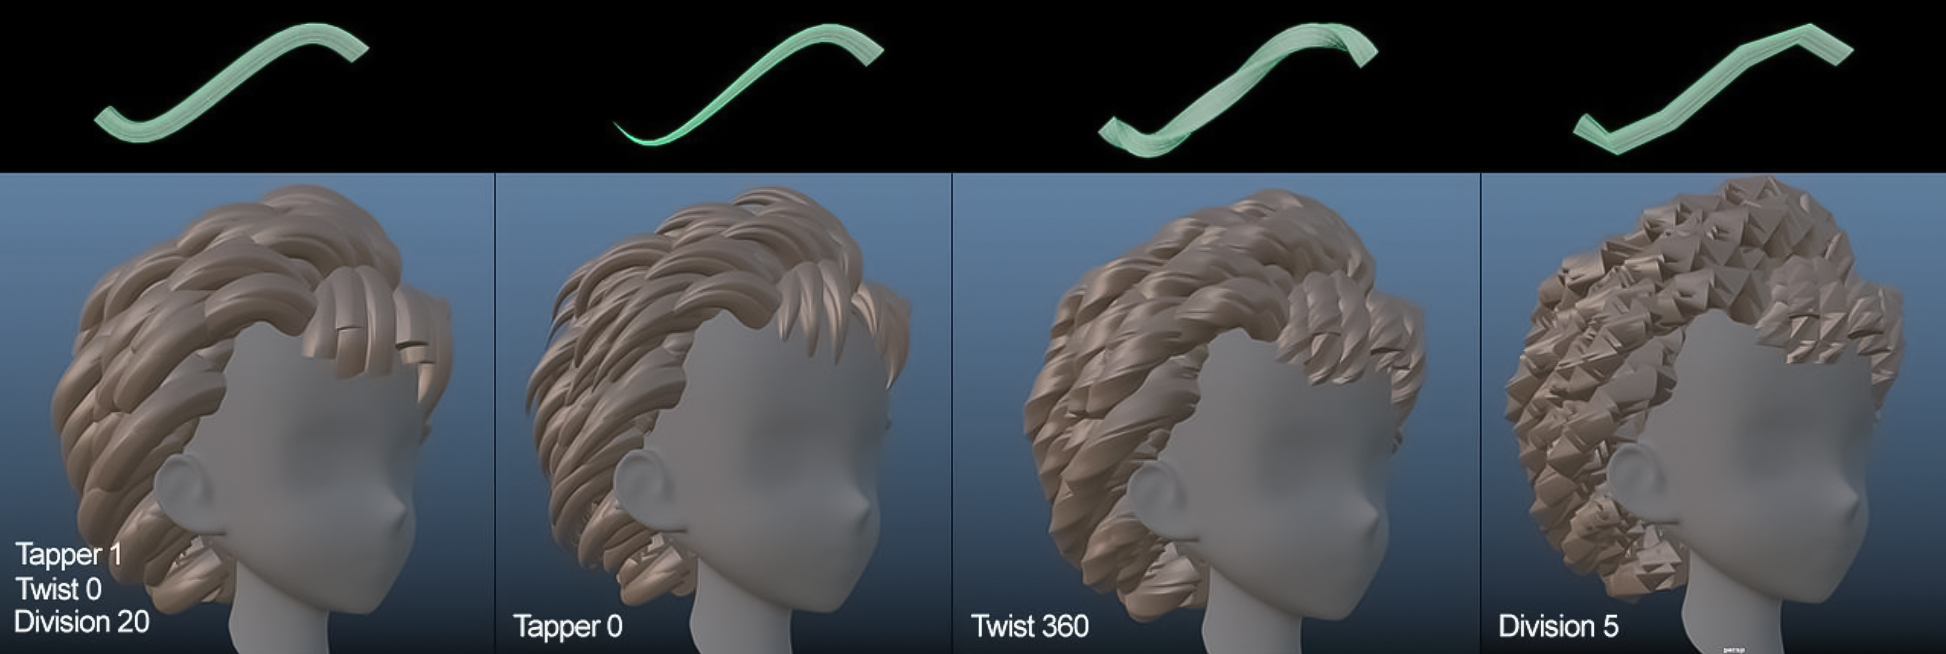
Poly Extrude : select a set of curves and press this button to Poly Extrude them using the selected profile.
To get the best result it’s best to put the profile curve in the scene origin.
Tapper : Tapper the extruded mesh, if you have a set of extruded meshes selected it will change the tapper of those meshes.
Twist : Twist the extruded mesh, if you have a set of extruded meshes selected it will change the twist of those meshes.
Division : set the Division of the extruded mesh, if you have a set of extruded meshes selected it will change the Division of those meshes.

Preset: enter the name of an extrude node preset here.
Apply Preset: apply the preset to all selected meshes. (applying preset is a much heavier task than changing twist or tapper, so if you have hundreds or thousands of curves and you want to apply a preset to all them, you should know that it will easily take a few minutes)
Apply Automatically: Enable this checkbox and the preset will get applied automatically whenever you extrude a curve, which includes live draw extrusion too.
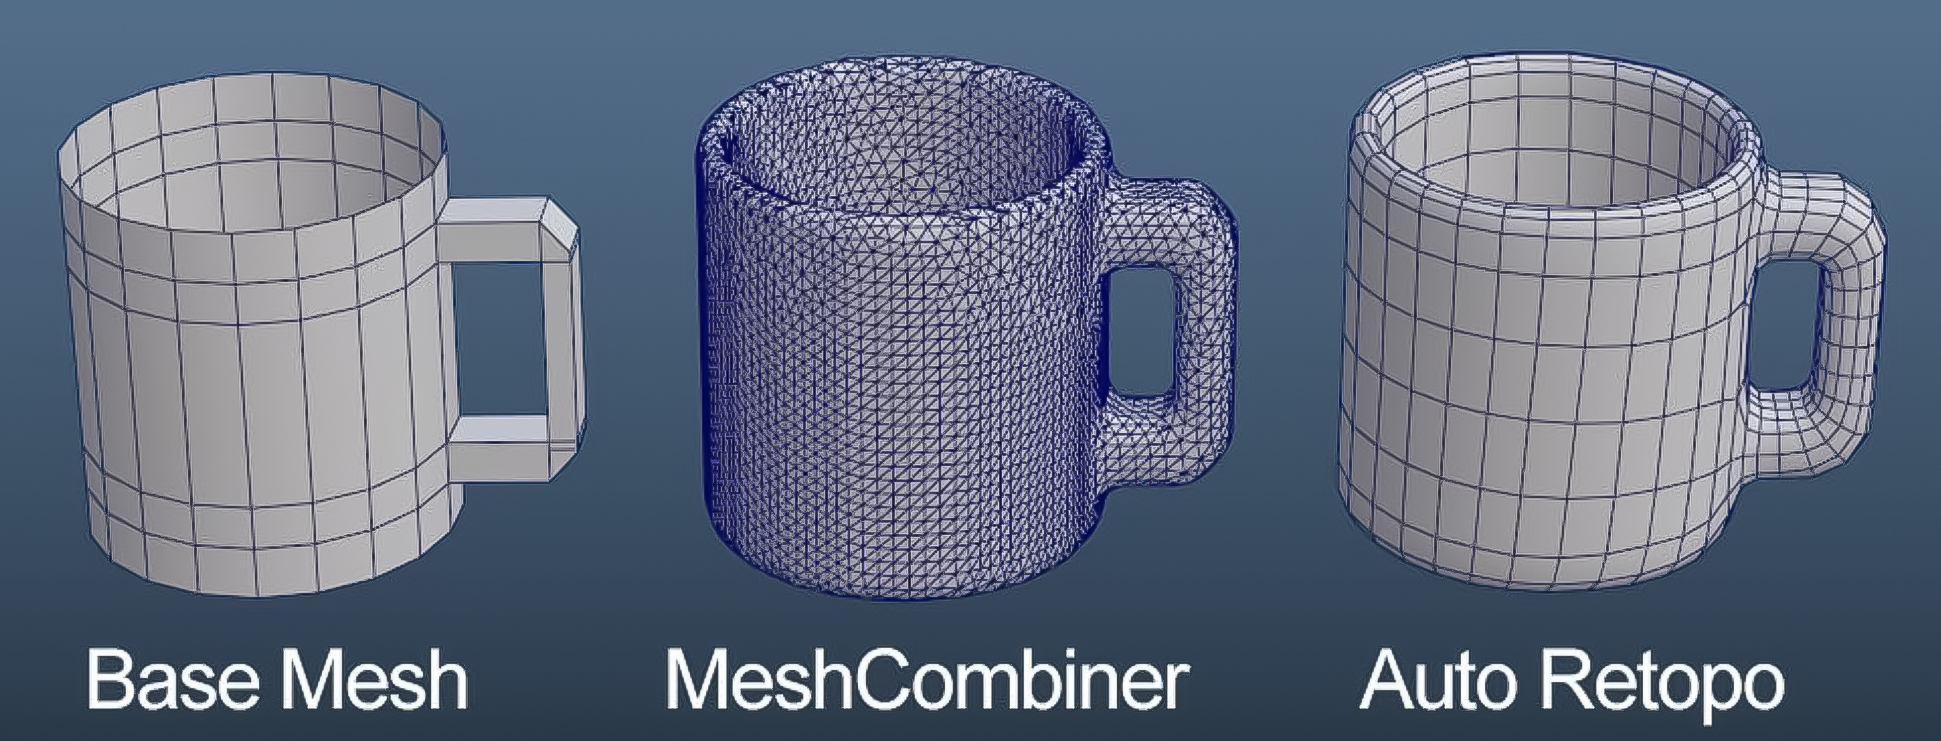
MeshCombiner/MetaMesh: MeshCombiner allows you to merge multiple meshes together. Something similar to Dynamesh in Zbrush but the MeshCombiner works in real-time, which means when you apply it you can still modify the original mesh and see the changes and merged geometry in real-time.
Subtractive Mesh ![]() : when you select a mesh and press this button you will notice that it will turn red, any mesh like that will get subtracted from your base mesh.
: when you select a mesh and press this button you will notice that it will turn red, any mesh like that will get subtracted from your base mesh.
MeshCombiner ![]() : select meshes you want to combine or remesh and
: select meshes you want to combine or remesh and
press this button to apply MeshCombiner.
If you right-click the MeshCombiner button on the sidebar you can find “Auto Retopo Mesh”, this is the same command that you can find in “Mesh>Retopologize”.
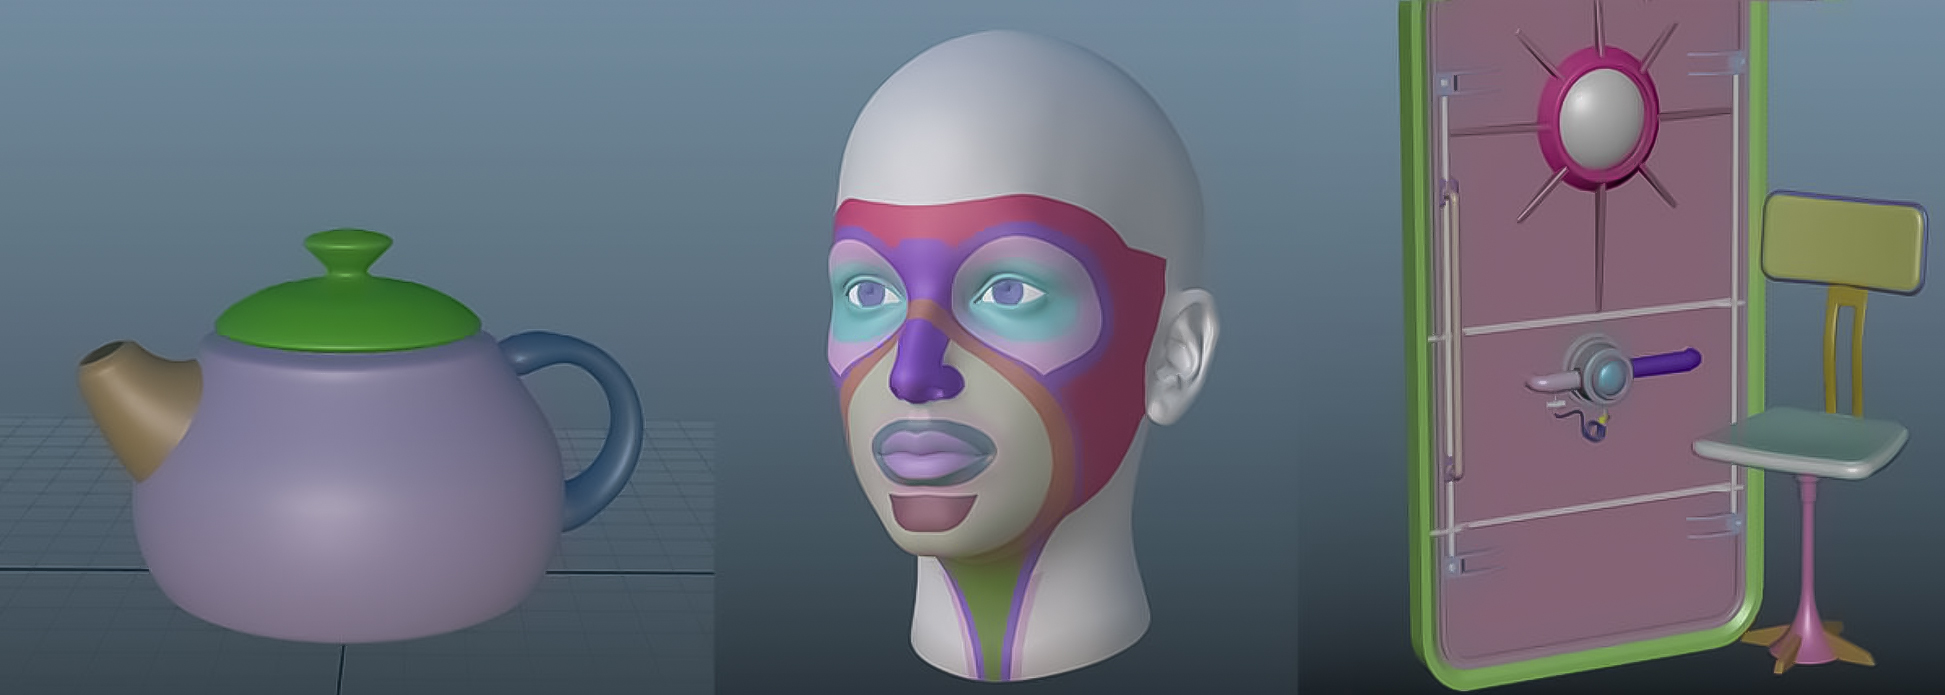
PolyMeshGroup ![]() : Inspired by Polygroup in Z-Brush. PolyMeshGroup is a quick way to make sets and color groups for your mesh.
: Inspired by Polygroup in Z-Brush. PolyMeshGroup is a quick way to make sets and color groups for your mesh.
You can use Polygroup to quickly select and modify different parts of polygon objects.
Righclick on this button to create or select Polygroup, you can also set hotkey for these actions in HotkeyEditor.
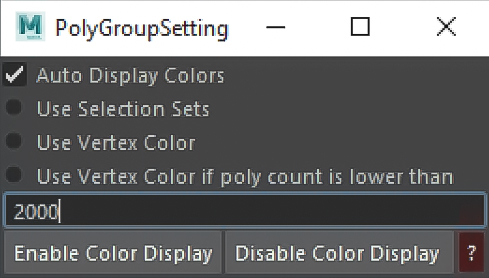
Clicking on this button will open PolyGroup Setting.
Auto Display Colors: show poly group color on your mesh when ever you create a poly group Use Selection Sets | Use Vertex color: there is two method for making polygroups.
one is to use vertex color, in this method not sets will get created, when you want to select a
group it will search and find all faces with the same color.
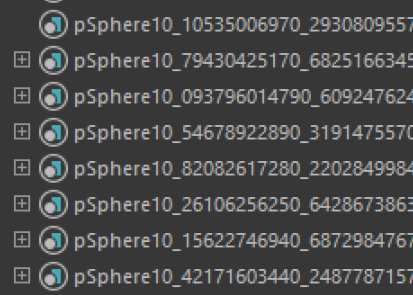
The other method will make sets, this method is incredibly faster, specially if your mesh has a high polycount, you can see the newly created sets in outliner.
Use Vertex Color if poly count is lower than: in this method it will use vertex color to create and select groups if your mesh has lower poly count than what is specified in the text field.
I recommend that you use sets as it is more stable, even on low poly models.
Automate PolyGroup: run a Mel command on every selected group. you should select only one face from every group, the script will select the whole group for you.
Some example Mel Commands:
createAndAssignShader lambert “”; // this code will create a new lamber shader for every poly group.
polyExtrudeFacet -ch 1 -kft 0 -off .5 -thickness 1 ; // extrude faces of each group with 0.5 offset and 1 thickness.
polyBevel3 -fraction 0.5 -offsetAsFraction 1 -chamfer 1 ; //Bevel every polygroup.

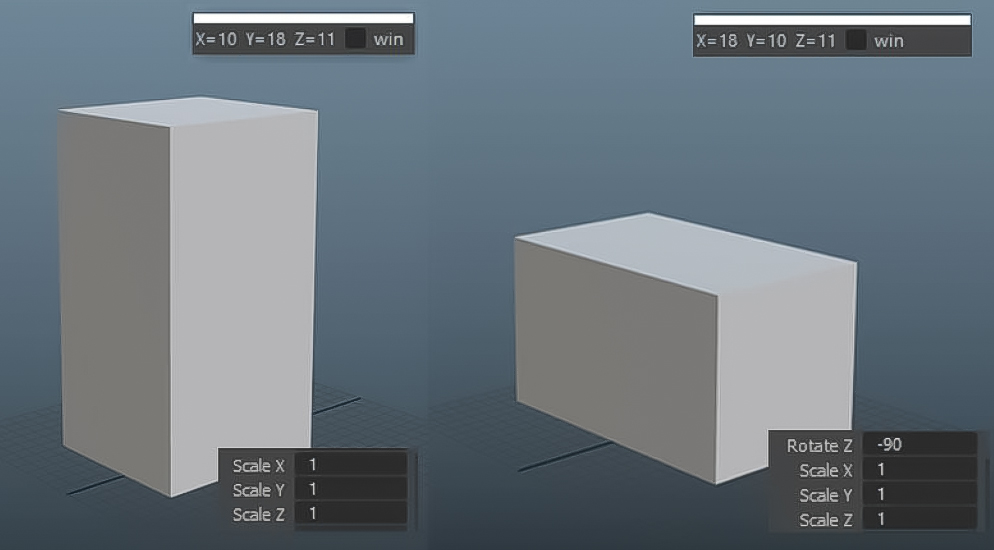
Object Scale ![]() : a small window that you can place
: a small window that you can place
somewhere on screen to see the real size of your object.
In many cases you may modify your object by moving their
components and you can’t rely on the scale of your object
in channel box to know it’s actual size in the scene.
Object Scale shows the actual height, depth and width of
the object, that means if you rotate it the height will
change.

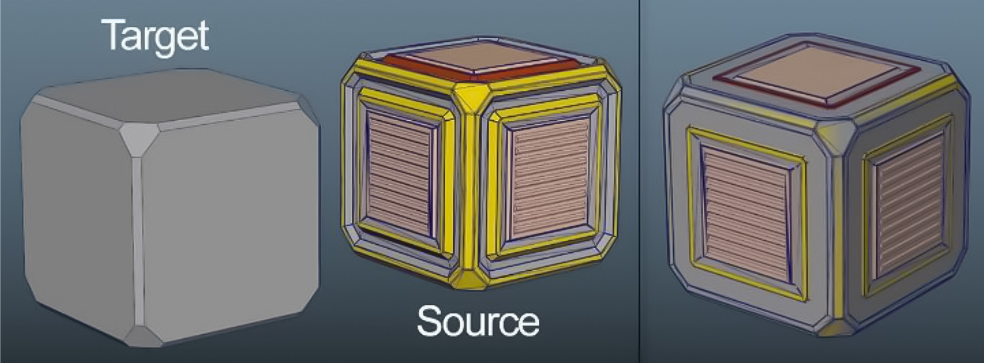
Quick Bake: the fastest possible way to bake different maps for your mesh.
To use quick bake you should have “turtle” plugin Loaded.
Right click on the quick bake button to set resolution and maps that you want to bake.
to use quick bake, you should place both target and source meshes on each other. first select your Target mesh followed by any source meshes and then click on the quick bake button.
